
Astrophotography with digital single-lens reflex cameras
Has it got what it takes to create astronomy photos? Seven settings that will turn your SLR camera into an astronomy photo machine.
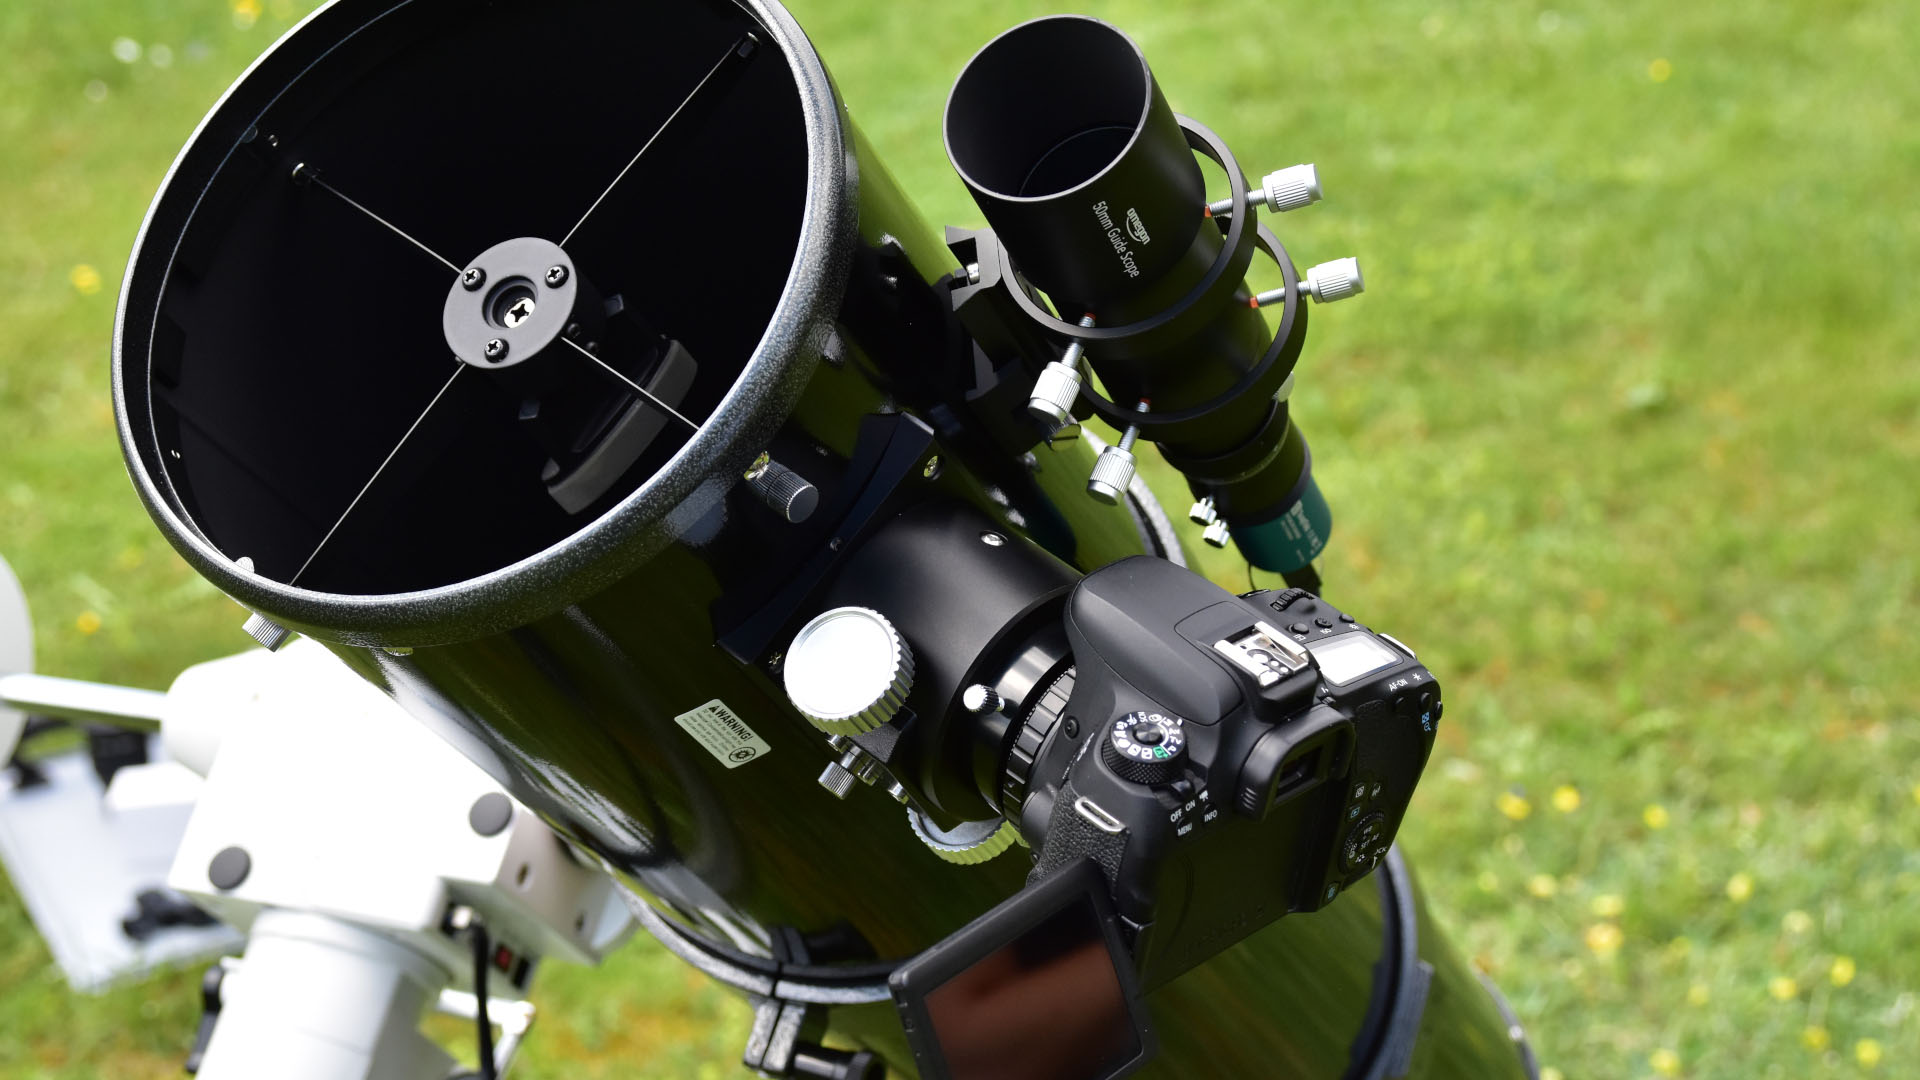
Capturing images through a telescope with SLR cameras
Anyone who owns a single-lens reflex camera can use it, together with a telescope, for capturing great astronomy images.
There are a large number of camera models on the market, so it's sometimes hard to choose the right one. If you already have a camera, you should go ahead and use it. However, if you plan to buy a camera for astronomy purposes, you should put some thought to the model you choose.
The most commonly used cameras belong to the Canon EOS range. There are also some Nikon models that will deliver wonderful results. With Canon cameras, you can capture images for around 5 minutes at a time, which makes them very interesting for astronomical purposes. At the same time, the camera’s thermal noise remains at an acceptable level.
But there are other models and manufacturers that are equally suitable. What is important is that the chip allows longer exposure times. A useful function is internal noise reduction. If you want to photograph fainter deep sky objects as well as brighter objects such as the Moon or planets, you usually need quite long exposure times. So it is often necessary to take several images of the target object and to combine them later on a computer.
The following camera features should be considered:
- RAW image format
- White balance setting for daylight
- Bulb mode
- Manual override
- Possible mirror lock-up
- Activated internal noise reduction
- Sensitivity of ISO 400-800, in some cases up to ISO 1,600
If you select the RAW format, it is not necessary to also set the white balance to daylight, because the image can be processed later. However, if you want to see how the image will look in terms of colour using the preview image or the unprocessed image, then this setting is useful.
After you have input the settings and added the appropriate adapter (see below), you’re ready to get going. Make sure that the batteries are fully charged and that you also have spare batteries to hand. On cold nights, the batteries are very quickly depleted. If you are working at home, you can acquire a suitable power supply. For use in the field, there are charging devices that can be connected to a car’s cigarette lighter. You should also buy a cable release to control the shutter release, as this ensures a vibration-free image.
How do you mount the camera onto the telescope?
With a single-lens reflex camera, you remove the camera lens and use the telescope for prime focus astrophotography. With a telescope focal length of 1,000 mm, you are also capturing images with a 1,000-mm focal length. Your telescope becomes a super-telephoto lens.
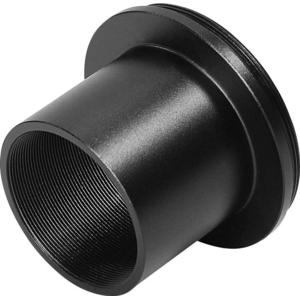
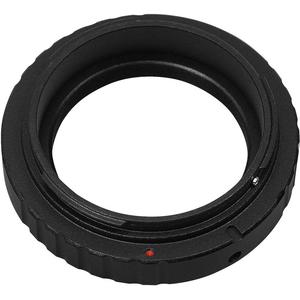
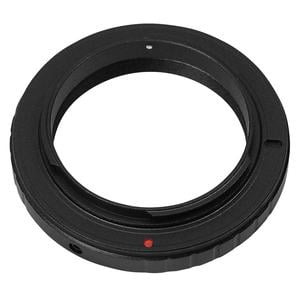
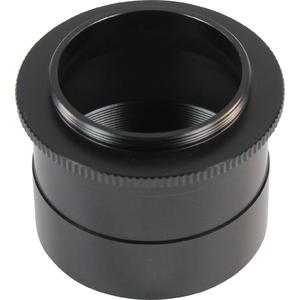
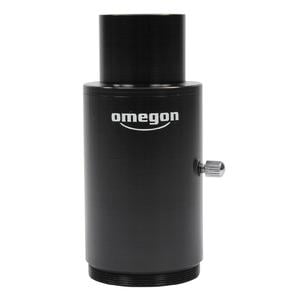
After removing the lens, attach a T2 ring to your camera bayonet. Since each camera has its own system, there is a T-ring available for just about every camera. On the other side of this ring is a T2 thread. Either a 1.25" or a 2" barrel is screwed into this thread. On the camera side you have a suitable thread and on the focuser side you have a plug-in adapter.
Once you have precisely aligned the mount to the celestial North Pole, the telescope is positioned precisely enough to obtain images with longer exposures. If the mount is not exactly aligned, instead of appearing as a point, a star will be seen as a trail, which is to be avoided.
Finding targets
It makes sense to first find the target with a long focal length eyepiece before attaching the camera. The target object will not be as easy to see through the camera viewfinder as through an eyepiece. It will now be relatively difficult to find the perfect focus, especially since most targets also appear very dark.
Unfortunately, with a single-lens reflex camera, it is not possible to focus using the LCD screen, but only via the camera viewfinder (except for very few brand-new camera models). It is best to focus by moving the focuser back and forth until the stars appear to be somewhat point-shaped. Since it is not yet possible to accurately judge whether you have found the perfect focus, it is advisable to carry out test exposures of around ten to fifteen seconds. With this exposure time, you should already have enough stars on the image to decide. Now it is best to zoom in the image (for many cameras, this can be done by turning a small wheel). If the star remains point-shaped, then you are in focus. If not, the stars will appear as a small disc with a black centre. You should simply keep trying until you are certain that it’s right.
Next you can also try a longer exposure time.
You can precisely align an equatorial mount, but without a tracking control you can only use short exposure times of usually no more than a minute, because no mount is exact over a long period of time. Tracking control is essential!
Guiding
You have captured some short-exposure images, maybe even a whole series of them, and later you have stacked and processed these images on your PC. Maybe you've got some really nice images among them and the stars are point-shaped. Then congratulations! But maybe you want to try out longer expose times, but without tracking control, trails will appear on the image because you cannot control the mount’s movement.
There’s nothing else for it – you have to "guide" your telescope. Simply put, you must help your mount to accurately track the image. You need to "look over the shoulder" of your mount by checking the tracking using a second control optic.
For this, you need a small, long focal length refractor, which you should mount parallel to your main tube. Then you can use a crosshair eyepiece to check the tracking. If it becomes necessary, you can easily make corrections with your motorised tracking control. Your heart will beat faster when you see really beautiful long-exposure images with point-shaped stars.
However, it is important that you first determine where in the eyepiece the right ascension direction lies. To do this, simply press the two right ascension direction buttons and watch in which direction the star moves. Then turn your crosshair eyepiece in the focuser until the thread points in the same direction. So you have a good orientation and know which buttons you need to press when your chosen guide star moves out of your field of view. You should react immediately if the star moves, so that this is not visible later in the image. It is not necessarily a bad thing if your guide star is not completely in focus, because then it is larger. But that’s something that everyone has to find out for themselves. During exposure, it is difficult to keep track of your chosen exposure time, so it is very useful to have a countdown timer to tell you acoustically when you should stop.
We will return briefly to the installation of the guide scope: it is possible to get hold of normal tube clamps to mount it onto your telescope tube. But it is even better if you get purpose-built guide scope tube clamps, because with these you can adjust the guide tube even more precisely, and also readjust a little if there is no star suitable for tracking in the field of view.
Tracking control can also be approached from a completely different angle. You do not need a guide scope, but an off-axis guider instead. This is a component that is inserted between the focuser and the camera. A small mirror tilted by 45° directs a little light into a focuser, into which a reticle eyepiece can be inserted. If you are working with such a guider, you will need a brighter star, located in the vicinity of your target.
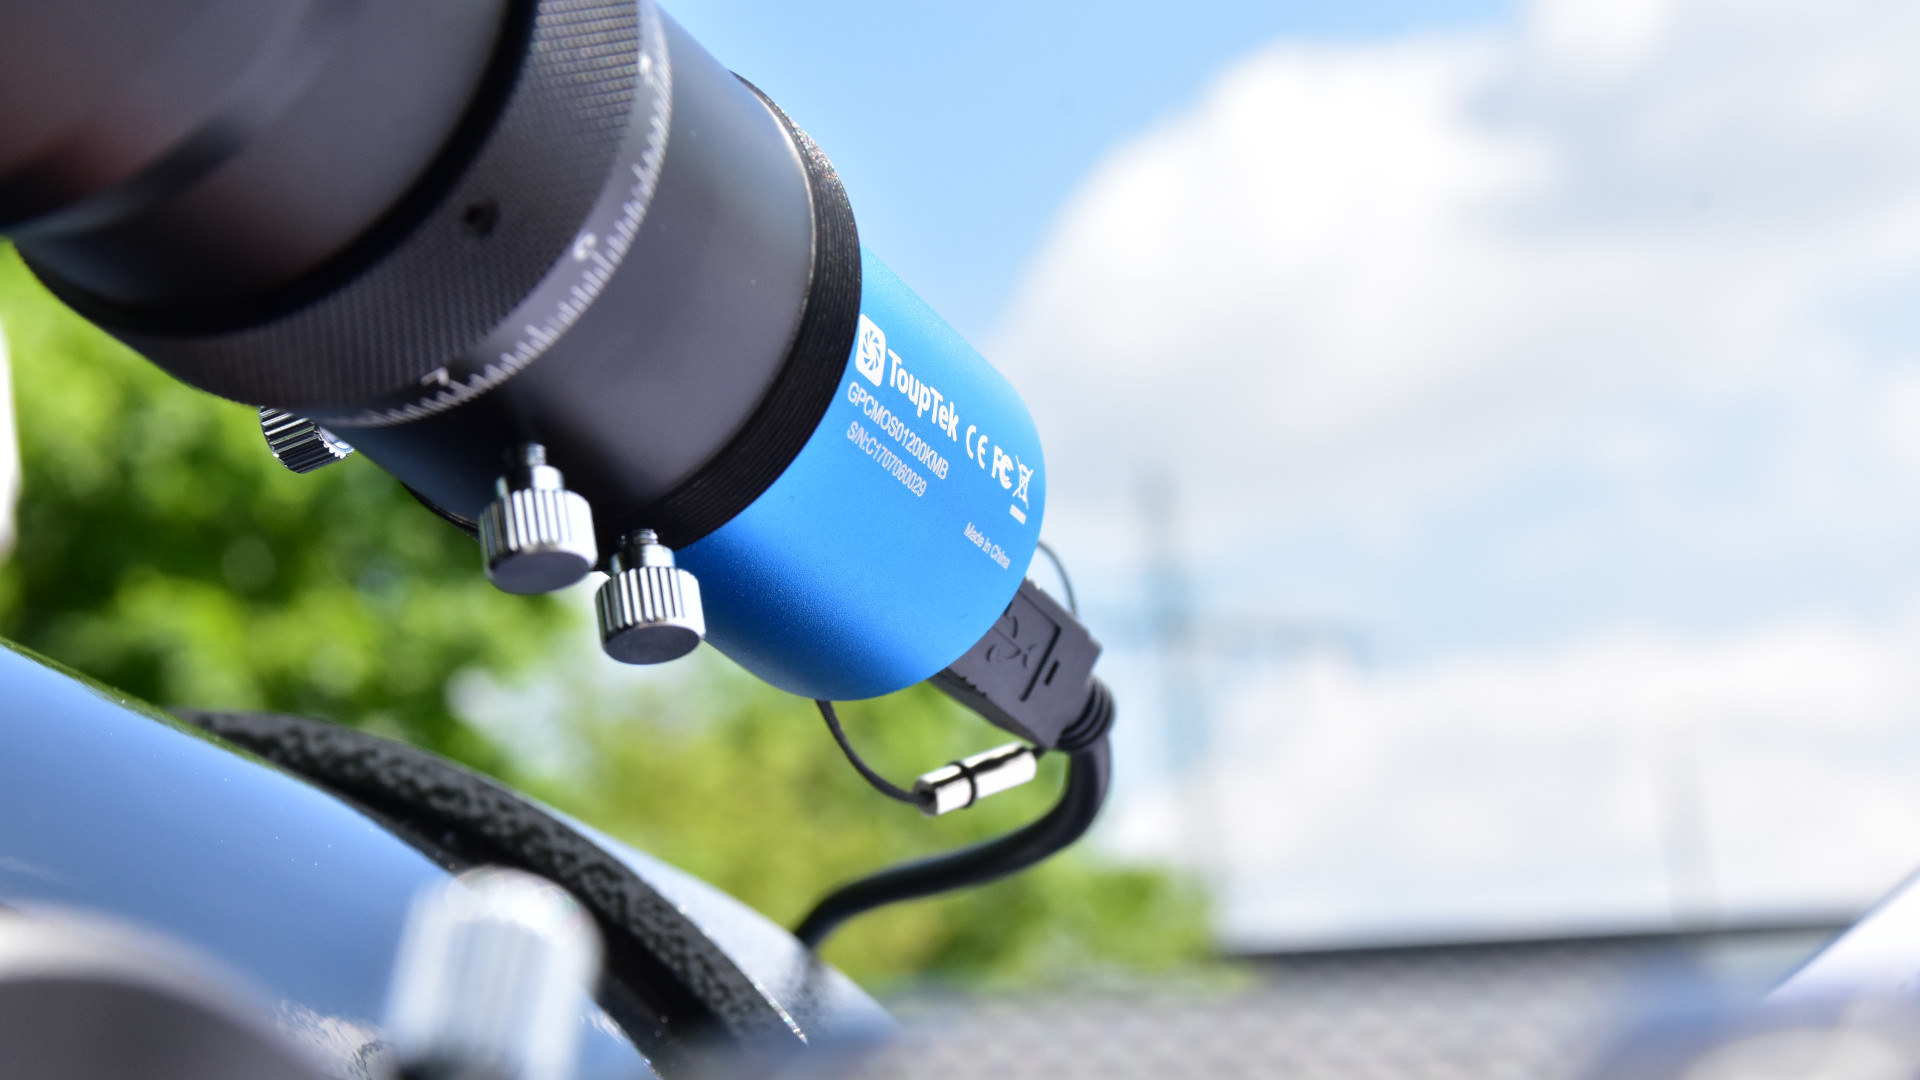
Controlling the tracking can be quite arduous for the observer. In addition, when tracking, you are losing potential observing time. The automation of the tracking process is called autoguiding. Almost all larger GoTo mounts can have autoguiding retro-fitted. The control loop requires a camera, PC, software and a cable to connect to the telescope. Low-cost webcams or highly sensitive video surveillance cameras such as Mintron, Watec and DMK can be used as cameras. The software is freely available on the internet. The Guidemaster program is often used. It is worth googling 'Autoguider' together with the name of your mount on the internet to get more information specific to your mount.
Recommended adapters for SLR cameras