
Telescopes
Getting started is not difficult - but you need a certain amount of know-how if you want to have lasting fun with astronomy. Our FAQs will help you get started.
Common questions before buying a telescope
Is it difficult to get started as a hobby astronomer, or can I simply give it a try?
The answer to this question is very clear: you can simply give it a try. There’s virtually nothing easier than pointing a telescope at the sky and looking through it. However, if you want to have lasting fun with this fascinating hobby, you should look into it a little more deeply first. We therefore recommend that you buy a beginner's book and a star chart, either before buying your telescope or at the same time, in order to accumulate some basic knowledge and to be able to orient yourself in the sky.
Which telescope should I buy?
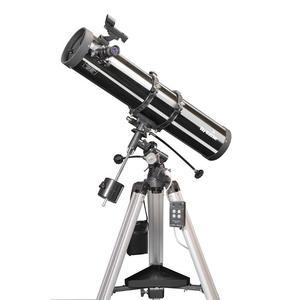
This is a good and also difficult question, which of course cannot be answered in a single sentence. Because first you need to be clear about what you want to observe. For example, if you want to get into deep sky observing, which should also include fainter galaxies, you won’t get by without an optic with an aperture of at least 200 mm. Only an aperture of this size or greater is recommended for observing galaxies. Reflectors (mirror telescopes) offer such an aperture at a relatively low price.
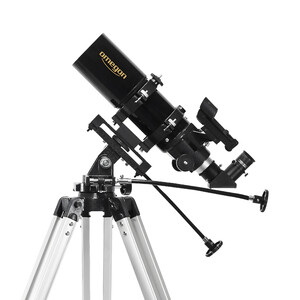
But if you are a fan of the Moon and the planets, a refractor (lens telescope) which offers an image that is rich in contrast, is a good choice. If you attach importance to a colour-neutral and particularly high-contrast image, you may consider an ED apochromat (a special form of refractor), which offers a pure-colour image even at high magnifications.
Apart from the optics, however, telescopes also differ in some other ways. There are some instruments that are particularly heavy and stable, and others that are very light and so are suitable for travelling. For children there are particularly easy-to-use telescopes, and for computer enthusiasts there is the possibility to control the telescope using your PC. You can find more information in these FAQs and on our other information pages: "Basic considerations when selecting a telescope". We are also happy to advise you personally on-site or by phone. Just give us a call, we are here to help you!
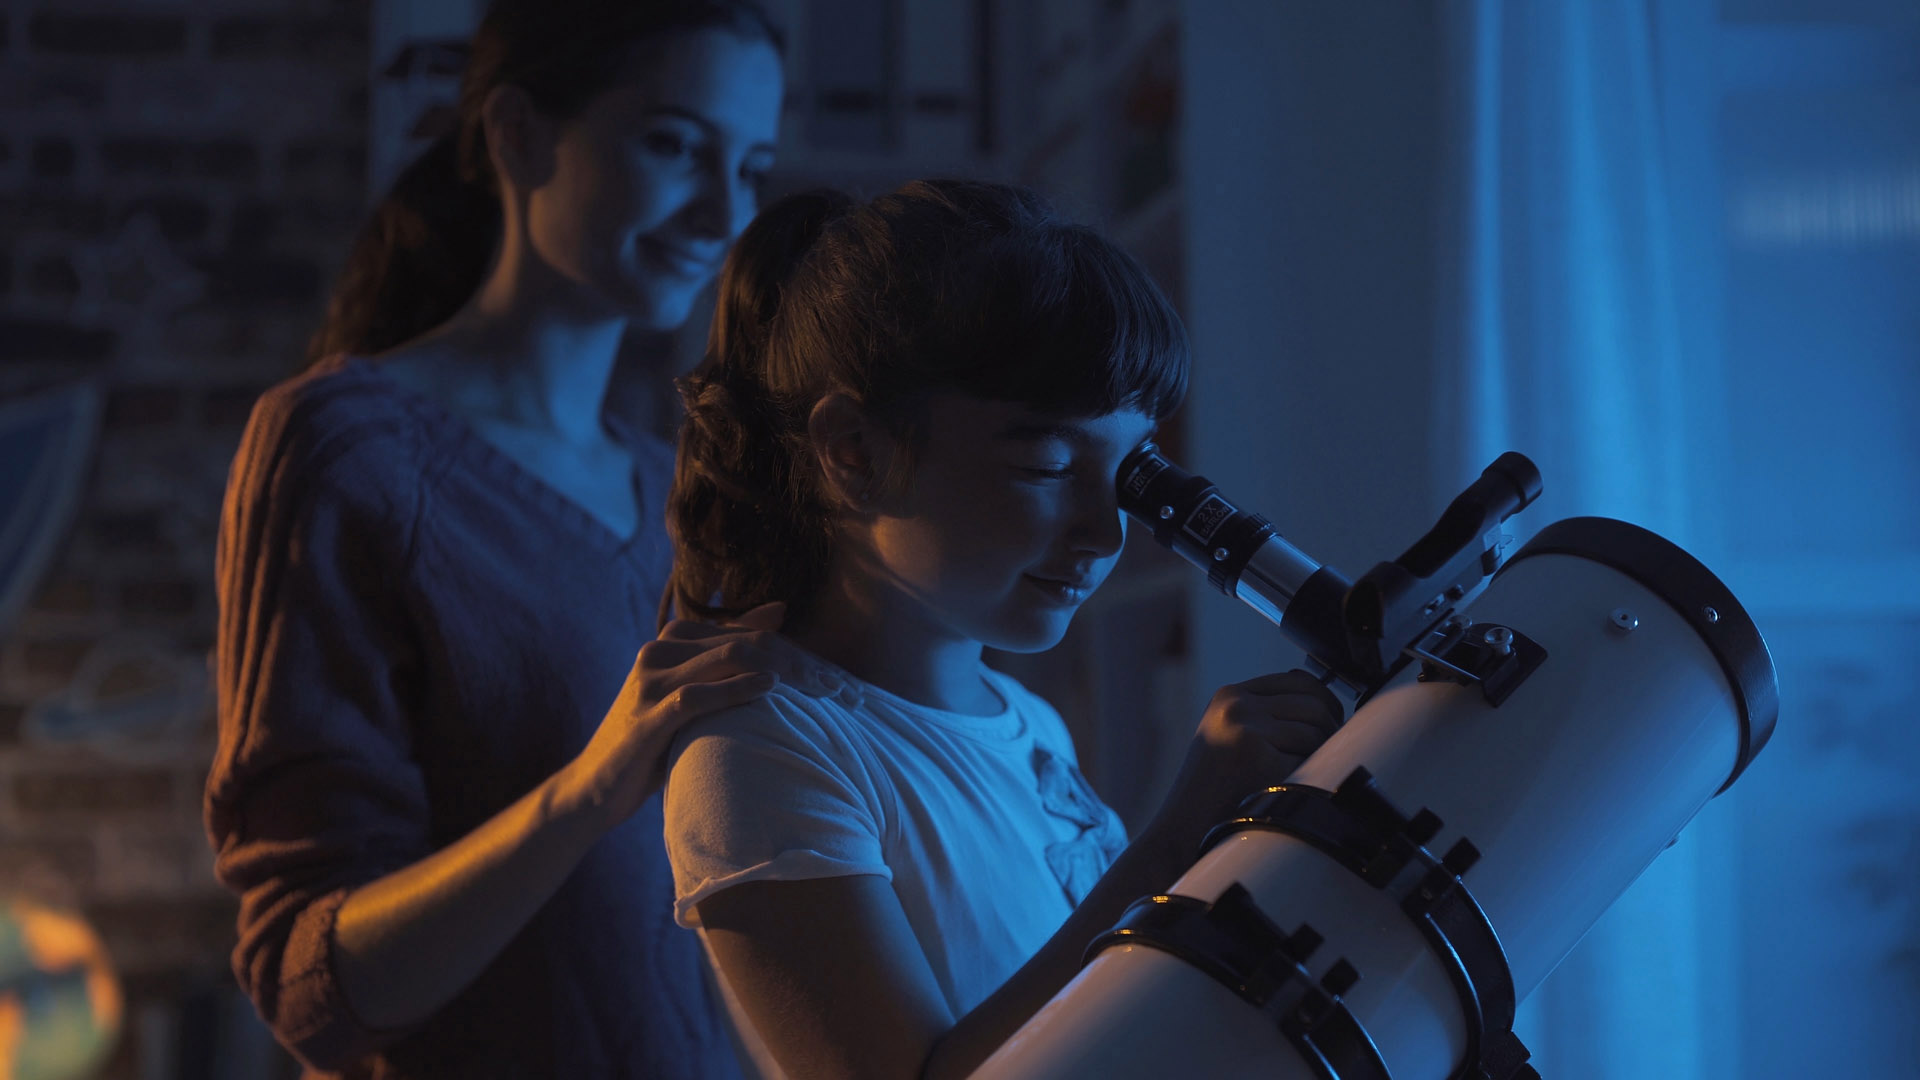
Which telescopes are suitable for children and adolescents?
With the Omegon N76/300, children from the age of six upwards can enjoy astronomy adventures, and take a look at the Moon before going to bed. The possibilities are limited, but on the other hand this small telescope is robust and easy to use.
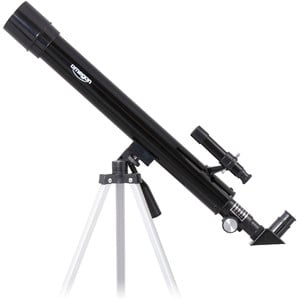
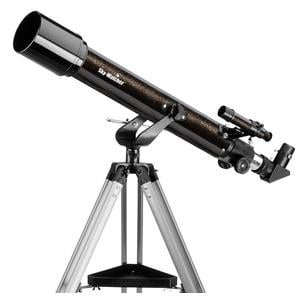
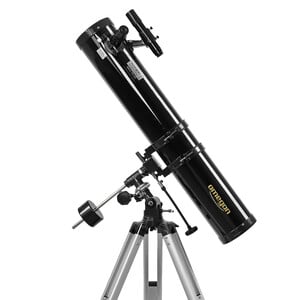
A lightweight telescope with a simple altazimuth mount is not only suitable for children, but also for adolescents and adults who are just starting out. You'll find a few examples here:
Telescopes recommended for beginners
Dobsonian telescopes
These telescopes are good for getting started and, due to their size and weight, are easy for children to handle. If you want to give your child a larger telescope, you would certainly be well advised to consider a Dobsonian telescope. These telescopes are very simple to set up, very easy to use, and the viewing position means that a child can easily reach the focuser.
We do not make any distinction between adult and adolescent beginners. If the budget allows, here are some recommendations for larger instruments with which you can really experience the diversity of the universe, such as:
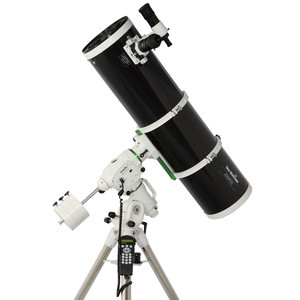
Recommended Dobsonian telescopes
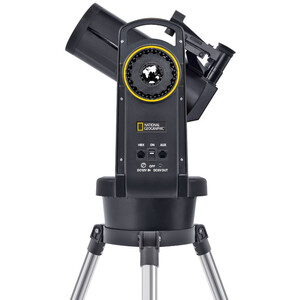
GoTo telescopes
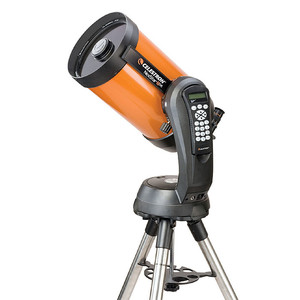
Here we must mention GoTo-capable telescopes, that is those equipped with a computer that can independently control the telescope to point it at the desired object. The following telescopes are by no means beyond the ability of adolescents or adults who are seriously interested in astronomy:
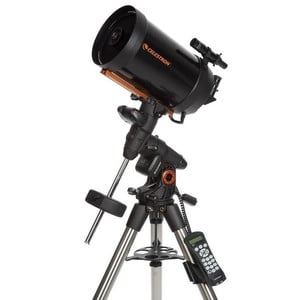
Recommended GoTo telescopes
How much do I need to invest in a good telescope?
This depends entirely on your requirements. Telescopes start from as little as €60. But if you want to get into astronomy in a meaningful way and do not want to be disappointed, an outlay of €300 or more would be appropriate. There are almost no upper limits: the more you invest in a telescope, the higher the optical quality, performance capability, mechanical stability and life expectancy of the instrument.
Brand name telescopes with prices of €1,000 or more are mostly designed to last for many years. Of course you can get quite good telescopes for less, but if the mechanical quality and optical performance are to be perfect, you should invest a little more.
Which telescope is most suitable for travelling?
If you want to travel with your telescope, you often have the problem that you can't take very much with you. So you should aim for a smaller telescope that will fit in your airline baggage. Here, the Celestron NeXstar SE or Meade ETX would be suitable. If you’re not bothered about computer control, you'll be well served with a Travelmax Maksutov from Skywatcher.
Frequently asked questions about observing with a telescope
What can I observe with a telescope, and what can't I?
This varies a little depending on the size of the telescope and therefore also the performance.
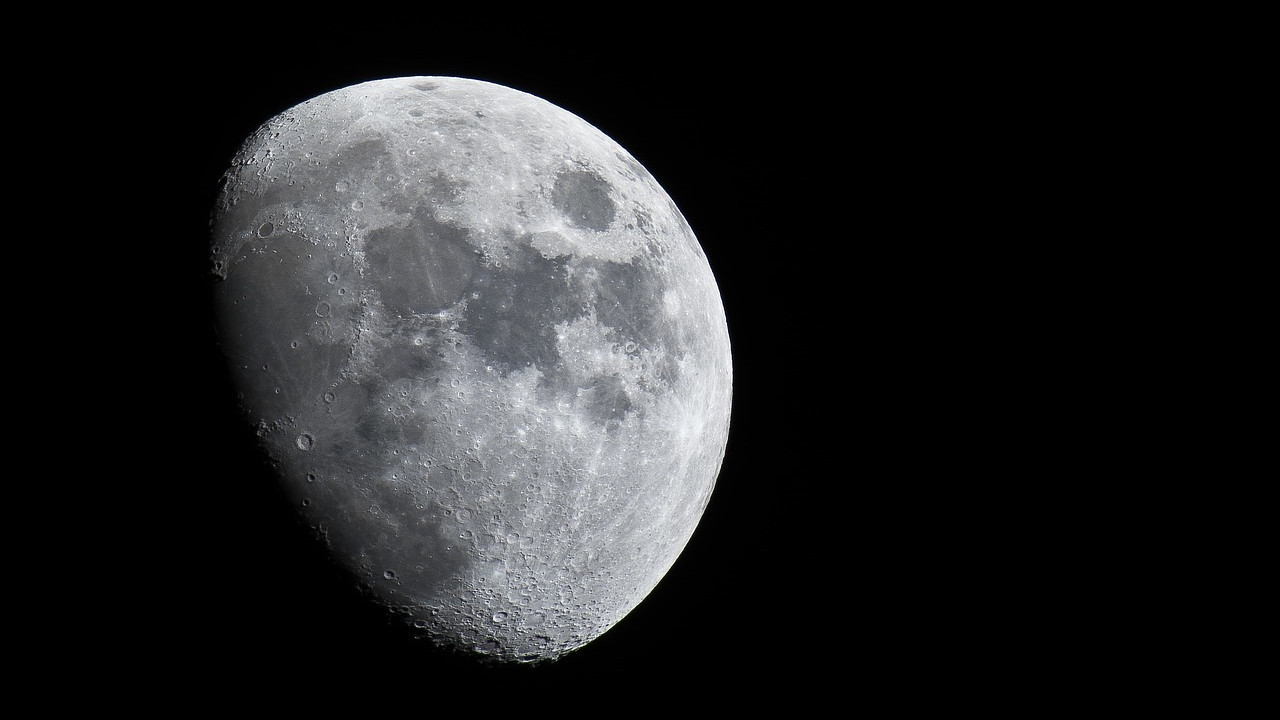
The Moon
The telescope shows you countless craters, some with the small central peaks in the middle. These structures hint at ejections of material during the formation of the crater.
The planets
The largest planet in our solar system is Jupiter. It is a very rewarding object to observe. You can see the four large Galilean moons, which, together with Jupiter itself, look like a small solar system. Cloud structures are visible, which continually change. The Great Red Spot, a storm on Jupiter which is 40,000 km wide, is also visible. With Saturn, you will see the big ring, the Cassini Division, equatorial bands and occasionally white clouds. In addition to some smaller moons, the largest moon in our solar system can also be seen: Saturn's moon Titan.
With Venus, its phases can be observed, because from our perspective Venus is only partially illuminated by the Sun.
Deep sky
Objects that are further away, beyond the solar system, can also be observed. These are, for example, planetary nebulae such as the Ring Nebula in constellation Lyra (2,000 light years (ly) away). Globular star clusters, sometimes with 1,000,000 stars, for example M13 (around 30,000 ly away). Galaxies (star systems like our Milky Way), for example the Andromeda Galaxy (2.5 million ly away). You can also observe emission nebulae where stars are created, such as the Orion Nebula, which is around 1,500 ly away.
Of course, it is not possible to list everything that can be seen with a telescope – the possibilities are virtually limitless, like the universe itself.
But we also want to save you from disappointment: the amazing colour images from the Hubble telescope sometimes decorate the packaging of smaller telescopes. These objects cannot be seen through the telescope as they are depicted on the packaging, not least because the images are astrophotographs that have been exposed over a long period of time (several minutes). However, you can take similarly beautiful pictures yourself with a good telescope and the appropriate accessories.
What accessories do I need?
The accessories that you absolutely need will depend on what you would like to observe. But as a general rule, where useful equipment is concerned, it is advisable to start with eyepieces. Two eyepieces are usually included in the basic equipment of most telescopes, which are responsible for providing different magnifications. There’s no harm in giving yourself a little more scope here by adding additional eyepieces.
For example, it makes sense to have eyepieces for low magnification, medium magnification and high magnification. But an even wider range is good. For example, planetary observation becomes very interesting from 150 times magnification. Deep sky objects, on the other hand, can often be observed very nicely with smaller magnifications.
Please note: the shorter the eyepiece focal length, the higher the magnification! However, depending on the telescope, there is a maximum usable magnification.
Apart from eyepieces, a Moon filter is useful, for example, or colour filters to increase contrast when observing planets. If you would like to pursue daytime astronomy, a solar filter is recommended. Baader solar filter film is most suitable for this.
Barlow lenses increase the focal length of the telescope by a factor of 2 or 3. If you use a 2x Barlow lens together with an eyepiece, you get double the magnification. For example, if you are using an eyepiece that gives your telescope 50x magnification, you can achieve a magnification of 100x with a Barlow lens in combination with the eyepiece. This saves you buying additional eyepieces but, in our opinion, this is always a compromise. Single eyepieces will give you a better image.
Do you also plan to observe on Earth with your telescope? In this case, we offer erecting lenses. A telescope always shows you an upside-down image. For celestial observation, it is not important whether the image is the right way up or not. This is not the case with terrestrial observation. The erecting lens rotates the image so that what you see is the right way up.
If you want to get into astrophotography, you need to buy appropriate accessories. The easiest way to do this is with a standard compact digital camera and a universal camera adapter. However, you can get even better results with a digital or analogue SLR camera. We also offer various adapters and so-called T-rings for your camera type.
Carrying out the right observations?
I would like to observe galaxies, but also be equipped for planets. What kind of telescope could I buy?
When it comes to galaxies, you should definitely consider a mirror telescope with an aperture of 200 mm or more because, in our opinion, observing galaxies only becomes interesting beyond this aperture size. Of course, such an optic is also suitable for planets.
Initially, it is not important whether you choose a Newtonian, Maksutov or Schmidt-Cassegrain. However, for a fixed budget, Newtonian mirror telescopes offer the greatest aperture for the money.
I would also like to carry out daytime terrestrial observation. Is that possible?
Yes, you can also observe on Earth with all telescopes. However, since a telescope creates an upside-down image, you need an optic that will invert the object and display it right-sided. For a Newtonian telescope, you need an erecting lens. For a refractor, it is better to choose a 45° or 90° Amici prism.
How can I observe the Sun through my telescope?
You will need a solar filter in order to observe the Sun. This is available as a film or glass filter. Placed in front of the lens, it only allows a tiny and harmless fraction of the light from the Sun into the telescope. In this way, you can observe the Sun in complete safety. Do not use eyepiece solar filters (which we do not stock) as they can be dangerous.
Warning: never look directly through the telescope without an appropriate solar filter!
What do colour filters do?
Colour filters improve the contrast for planetary observation. Details on the surface that are otherwise faint or not visible at all can be detected with the appropriate filters. We will be happy to help you select the correct filters for your needs. The manufacturer Omegon offers a colour filter set that is particularly recommended. You get six different colour filters at a very reasonable price. Our in-house testing confirmed that they offer excellent optical quality and the combination is very well suited for enhancing the contrast for a wide variety of planets.
I have bought a filter. How should I attach it?
The filters are not placed directly in front of the eye, but are screwed into the silver eyepiece sleeve on the telescope side.
Are zoom eyepieces suitable for observing?
Zoom eyepieces are good for observing the Sun using a H-alpha filter and for nature-watching, for example with spotting scopes.
For astronomical observation, they can only be a compromise. At high magnification, the apparent field of view is greatly decreased. Maybe to just 40-45°. It is only with a fixed eyepiece that the focal length can be exactly calculated, and thus produce a perfect image.
In zoom eyepieces, a group of lenses moves inside, which means that these lenses cannot be in the perfect position within this optical system. The shape of a lens in relation to the distance to the other lenses is suboptimal.
In practice, this means a loss of contrast and edge sharpness. This is a disadvantage for observing stars, but it is of little or no consequence when observing large objects or fields.
Common problems with telescopes
I don't see anything when I look through my telescope - what am I doing wrong?
Beginners are often disappointed when they look through a telescope for the first time. This is mostly due to false expectations, or because they can't find the objects.
Don’t worry. In most cases, the problem can be resolved quickly. We have created a short check list for you.
Check list:
- The telescope is suitable for observing stars only at night and outdoors. It is not possible to observe in the house or during the day.
- For observation, the cap must be removed from the telescope and an eyepiece inserted. Have you not only removed the small cap but also the entire large one? If not, too little light enters the telescope and everything will seem black.
- Have you aligned the telescope and finder? If not, you may be looking into an area of the sky where there are no objects to observe. It is best to align the finder with an object on the horizon, such as a chimney or a church tower.
- Always start with a small magnification, focus the image, and then little by little increase the magnification. Using a high magnification from the outset does not bring success. This could also be the reason for everything being black.
- Are you sure you have adjusted the focus on the focuser? If the objects are not in focus, this may also be the reason for a black image.
- Is the telescope collimated? The mirrors can become displaced during transport. If they are too far out of alignment, the telescope will show a poor image at higher magnifications.
- Have you let your telescope cool down for long enough outdoors? The mirror and the tube must adapt or acclimatise to the ambient temperature, otherwise the instrument will not produce a good image.
- What did you observe? Stars don’t look any different at higher magnifications than at low magnifications. It is objects like planets and nebulae that are interesting.
- Is the magnification too high for your particular object? For example, if you observe a faint galaxy with 300 times magnification, the image will almost certainly appear black. Each object requires its own unique magnification. Set a lower magnification and try again. Do a test with the Moon, it is the brightest object in the sky, and you can try out all levels of magnification with it.
During the day you should already have found out what you can observe best, when, where, and how. An almanac such as “Das Himmelsjahr” is indispensable.
- We also recommend that you take the time to work through the instructions for your instrument!
- Select the Moon as your first test object. It is the easiest object to find, and with your first successful observation, you can already resolve many typical beginner’s problems.
Tip: To get started, seek advice from an observatory or an astronomy club. There are more than 100 observatories in Germany that look forward to welcoming visitors! There you will find experienced amateur astronomers who will have certainly had similar experiences when they started out. There is almost certainly a club near you. Just take a look here: http://www.astronomie.de/gad/
At high magnifications, the Moon and planets are completely blurred. Is there something wrong with my instrument?
As a rule, the resolution of astronomical objects is not limited by your optics, but by the seeing. An astronomer uses the term "seeing" to describe the air turbulence that blurs the target object. On nights when the stars flicker, through the telescope this flickering will only increase. High magnifications are only useful on a handful of nights. The distance from the horizon also has an influence on the seeing. When the target object is close to the horizon, you need to look through a large amount of atmosphere, which reduces the image quality. Toward the zenith, on the other hand, the path of light through the atmosphere is shorter and higher magnifications are possible. The following rule of thumb applies: For the Moon and planetary observation, the distance from the horizon should be at least 40 degrees.
The large amount of atmosphere in the direction of the horizon is one reason why telescopes for daytime nature-watching should be operated with maximum 50 times magnification.
Please note that you should not try to look through a window. The surfaces of the telescope optics are far more precisely machined than window glass surfaces. Therefore, no telescope can deliver maximum performance when pointed through a window.
Only use the appliance outdoors and allow it to cool down sufficiently before use. Air turbulence in the vicinity of windows, roofs or warm buildings also noticeably deteriorates the image quality at higher magnifications!
If you are unsure about the performance of your telescope, you can test it with double stars. Here the contrast is so great that even under moderate conditions higher magnifications are possible. In addition, there is almost always an interesting object in the vicinity of the zenith.
Here you will find lists of challenging objects:
The Moon seems to lack contrast when viewed through the telescope?
The Moon is a very worthwhile object when you’re just starting out exploring the night sky. It is beautiful to look at through any telescope. However, some times are more suitable for observing than others. To see contours on the Moon, you need strong contrasts. The shadows cast during the Crescent Moon phase are ideal. At Full Moon, there are no shadows on the Moon and the image appears flat and low in contrast.
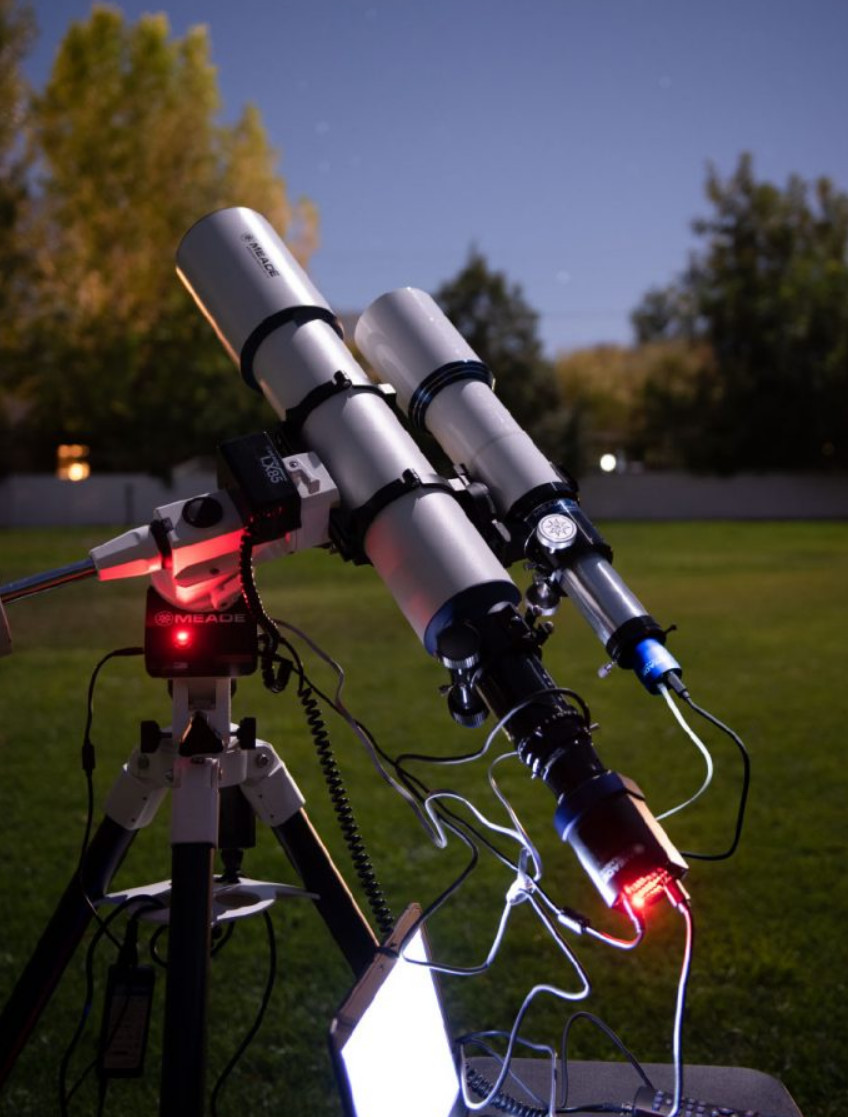
I want to take astro-photos. What else do I need?
The easiest way to conduct astrophotography is to attach a camera to the telescope piggyback. Then you can use a photographic lens to capture images of the night sky. You don't need anything other than a mount that can be operated precisely, and a crosshair eyepiece for tracking control for lenses with longer focal lengths. Of course, your mount should have a motorised tracking system.
With a PC-eyepiece, you can display the Moon and planets directly on your PC screen and save the images. If you do not have a PC, or prefer to transfer the image to a video camera or television, you can use a video eyepiece.
A very popular camera for astrophotography is a webcam. These are mainly used to photograph our planets and the Moon. However, you need to have a PC or laptop near the telescope so that your recordings can be transferred directly. The Omegon CCD Solar System Imager is suitable for this purpose. It has a real CCD chip and not, as with other cameras, a CMOS chip. It is particularly suitable for astronomy purposes. Together with a 1.25" adapter, it can be connected to a telescope. In addition, we would recommend a Barlow lens, which can be used to increase the focal length of the telescope and thus also increase the planets’ image aspect ratio.
Another option is the Brightstar Mammut L429 CCD camera. Such a camera is referred to as a true astronomical camera. Thanks to a highly sensitive chip and thermoelectric cooling, it is possible to get beautiful deep sky images after only a short familiarisation period; something that, until recently, was only available to professionals.
- If you have a compact digital camera, you can connect it to your telescope with the universal camera adapter.
- With a single-lens reflex camera, a camera adapter and a suitable T-ring, it is possible to connect your camera directly to your telescope.
- For planetary photography, you need a projection adapter, into which the eyepiece is inserted, to project the planet onto the image sensor.
Just contact us for in-depth astrophotography advice.
Would I be better using a Barlow lens or the appropriate eyepieces for magnification?
In our opinion, there is nothing better than the performance you get from a good eyepiece. A Barlow lens always brings an additional optical component to the system which creates reflexes, and therefore the quality of the image can be somewhat compromised. Nevertheless, a Barlow lens is of course practical. It is almost essential for webcam photography, because you can increase the focal length of the telescope and thus increase the scale of the planets’ image.
Instead of seeing my selected object through the eyepiece, I only see the secondary mirror.
There are two possible causes. Either you haven’t yet inserted an eyepiece into the focuser, or the distance between your eye and the eyepiece is too great. Please insert the eyepiece with the longest focal length into the focuser, and move your eye to a position just one millimetre away from the eyepiece lens. The secondary mirror will then disappear. If, despite focusing, only a light or dark featureless surface is visible, the telescope is pointing at an area of the sky where there is nothing to see.
Telescope basics
How is a telescope constructed?
A telescope consists of the optic, the mount, the tripod, and the eyepieces. Here you will discover more about the individual components. The most important differences can be found in the design: an important distinction is made here between lens telescopes (refractors) and mirror telescopes (reflectors). These two designs are themselves split into different subtypes.
The diagram illustrates the various sizes of commercially available telescopes for beginners:
Mirror telescope or refracting lens telescope? Schmidt-Cassegrain or Maksutov? Anyone faced with these agonizing questions before buying a telescope needs to find out about the advantages and disadvantages of the different design types.
Refracting lens telescope:
- Fraunhofer Achromat: classic principle of a refractor, but with chromatic aberration.
- ED Apochromat: two- or three-lens refractor with an ED lens that reduces the most chromatic aberration and ensures maximum contrast. Among these refractors there are also some very well-corrected three-lens optics that correct chromatic aberration and field curvature and so are very suitable for astrophotography.
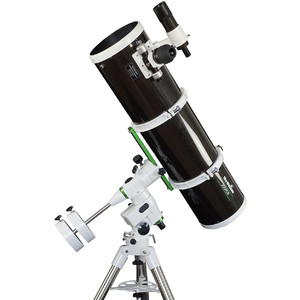
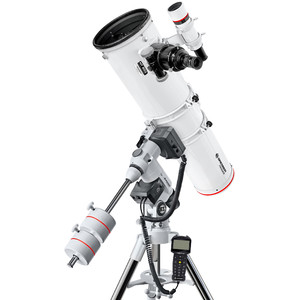
Reflector mirror telescope
- Newtonian Reflector: classic telescope, named after Isaac Newton, with a main mirror and a secondary mirror. Simple and proven system.
- Maksutov Cassegrain: system consists of a main mirror and a secondary mirror, and a meniscus correction lens.
- Schmidt-Cassegrain: similar to the Maksutov, but instead of the correction lens, a Schmidt plate sits in front of the optics in order to correct chromatic aberration.
For the optical properties such as lens aperture and focal length: the larger the telescope aperture, the more light it can collect. This characteristic is usually more important than the focal length, which governs the telescope’s magnification capability.
A good refractor delivers a beautiful, high contrast image. There are no components in the light path that could lead to shadowing and loss of light (as is the case with a reflecting telescope). There are no noticeable so-called spikes, and open star clusters look needle-fine and very aesthetically attractive. On the other hand, they are usually only available in smaller diameters, as these telescopes would otherwise become very cumbersome and expensive. In addition, many short focal length refractors have colour defects.
Conversely, reflectors with very large diameters are available, and therefore also offer plenty of light. This is important for deep sky observing, for example. If you compare a reflector and a refractor of the same aperture, the reflector is usually cheaper.
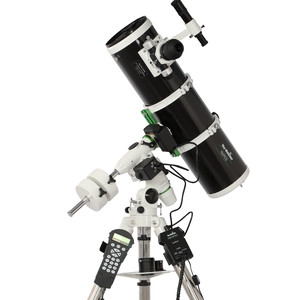
For the type of mount: here one distinguishes between astronomical (equatorial) mounts and the simpler (altazimuth) mounts. The former is recommended for most observation purposes, as it allows the telescope to compensate for the rotation of the Earth by turning on just one small knob, thereby keeping the target celestial object in focus. On the other hand, the altazimuth mount is easier to set up and operate, easier to transport and is especially suitable for daytime nature watching.
Some telescopes are also equipped with a so-called GoTo control. Many thousands of celestial objects are stored in an integrated computer, which can then be tracked automatically at the push of a button.
Can I control my telescope using a PC?
If your telescope has a GoTo function, it can also be controlled via an external PC. However, we generally advise beginners not to try this. In principle, the hand control box already has all the functions that a PC can offer. For beginners, it is more important to first understand the hand control’s working principles, and to learn about the basic telescope functions.
For those who want to use a PC for telescope control, we have a few tips:
The PC connection is usually made using a Western plug (telescope end) and a RS232 plug (PC end). The Western plug is not plugged directly into the telescope, but into the hand control box. Celestron and Skywatcher include the required cable with many of their GoTo mounts.
If your computer does not have a RS232 port, you can use a USB to RS232 adapter. This adapter is also suitable for Skywatcher instruments. Various star chart software programs can be used, such as Redshift or the freeware Cartes du Ciel. The manufacturers also offer their own programs. Meade's software is called Autostar, Celeston's is called Nexremote.
Occasionally we get queries because the connection between the PC and the hand control box doesn’t work. The most common cause lies with the PC and the RS232 USB adapter. We recommend that you assign a different COM port to the RS232 USB adapter in Device Manager, and then restart the PC. After restarting, check in the Device Manager that the COM port has been updated. Additionally, the control software also needs to be updated. If it is still not possible to connect, we recommend replacing the RS232 USB adapter driver with a genuine Prolific driver. If you want to avoid the problems common to the RS232-USB adapter, we recommend working wirelessly. The Omegon SkyFi Wireless LAN adapter works with iPhone, iPad or PC.
Basically, the telescope control works with all later versions of Windows, provided that the USB RS232 adapter has a suitable driver. If the Meade or Celestron control software is only compatible with older versions of the operating system, you can use the compatibility mode. Alternatively, most standard planetarium programs have a suitable interface.
If these tips do not succeed in connecting the telescope to the computer, it is best to address the problem directly with the manufacturer. You can find the contact details under Technical Support.
There are fully equipped telescopes available, which come with a GoTo function. Here you can use the small computer supplied to point at almost any object. A selection of telescopes with this technology can be found here! Some telescopes offer the additional option of connecting the telescope to a PC via an interface. In addition, you need a program (or driver) that supports the telescope’s function. For example, the Starry Night program.
What can a telescope motor do for me?
Many telescopes with an equatorial mount come without a motor. Once the telescope has been aligned with the pole star and an object has been set, the right ascension axis drive wheel must be rotated. In this way, you compensate for the rotation of the earth, and the object remains in the centre of the field of view. Anyone who observes for a long period of time will find that this is very tedious in the long run. A motor can take over this job for you and allows you to totally concentrate on your observation. A motor is essential for astrophotography.
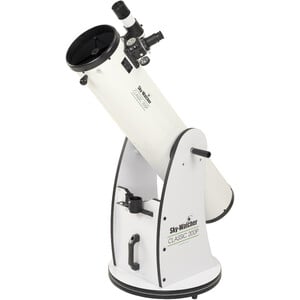
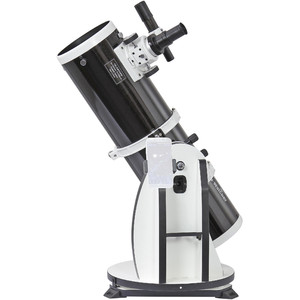
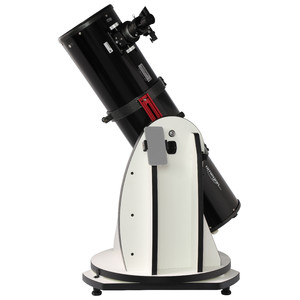
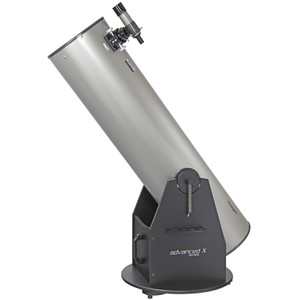
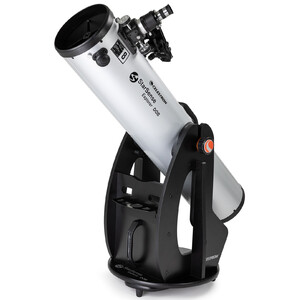
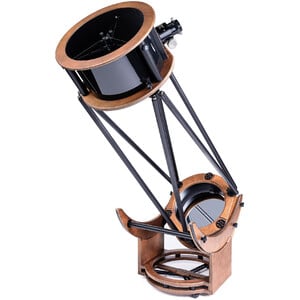
What is a Dobsonian telescope?
.jpg)
This is a Newtonian mirror telescope, which is suspended in a wooden box (a so-called rocker box), which replaces the mount and tripod. A Dobsonian telescope is therefore very simple, so that here the money is almost exclusively invested in the optics. With this altazimuth Dobsonian mount, the telescope can be easily moved in all directions. Additional roller and pivot bearings facilitate handling.
Anyone who invests in a Dobsonian has the advantage of a quick set-up, because the telescope consists only of the optics and the rocker box. Both parts are assembled extremely quickly, and you can start observing without having to align the telescope first.
About us
Can I visit you and take a look at the telescopes before buying?
Of course. We have a showroom where the different telescopes can be examined in detail. Can I visit and take a look at the telescopes before buying? You can handle the telescopes first, and decide which is the right one for you.
Additionally, we can advise you personally, which is a great pleasure for us. As we are not a usual retail store, we do ask you to call us in advance to make an appointment.
Don't I get the best value for money if I buy a telescope from a discount retailer?
There are a number of reasons why it is better not to buy from a discount retailer:
- It is true that discount retailers can offer a correspondingly cheap price because they deal in huge quantities. However, the low-cost telescopes on offer are often a frustration for the buyer, because they frequently do not deliver what was promised. So someone with an interest in astronomy can very quickly be put off this amazing hobby. It's better to spend a little more money and then have a really good telescope that you can put to good use. The advantage: your enthusiasm for astronomy is retained or even grows.
- You cannot expect any advice or after-sales service from a discount retailer. Just call us, and we will advise you which telescope is exactly the right one for you. Even after your purchase, we are here to help you in case you have problems with the set-up or operation, at no extra charge. There is no such service from discount retailers.
- A telescope is a very versatile instrument, as there are many different accessories available. Discount retailers generally do not offer any accessories. In contrast, we offer you just about every useful accessory there is, sourced from all over the world.
I'm sceptical about buying a telescope online. Shouldn't I go to a bricks-and-mortar retailer?
Sure, come to us! You are very welcome to visit our showroom, where we can show you various instruments up close.
If you do not live in southern Germany or do not have the opportunity to visit us, there are also good reasons why buying from us online makes sense:
- As a nationwide provider, we can almost always guarantee the best prices, thanks to our buying power.
- You may be able to see telescopes in a store, but you can hardly put them to the test at night. Once bought, it is usually not possible to return them. With us, it’s different: you have a general 14-day right of return for products that we send you, so you can test the products in action and return them if you don't like them.
Other
Which telescope brand is the best?
One cannot say with certainty that one or another brand is the best. Of course, there are certain telescope brands that can be relied on to manufacture high-quality mass-produced telescopes. Among these you would count brands such as Celestron, Vixen and Meade. But also cheaper brands such as Omegon Basic and Skywatcher represent good and persuasive quality. Most of the low- to mid-range telescopes are manufactured in China. However, since branded products from China are subject to high quality controls, the quality is also good.
Which binoculars are suitable for celestial observation?
Binoculars suitable for celestial observation should be relatively fast, optically speaking. In this respect, lens diameters from 42 or 50 mm upwards are worth considering. These binoculars are so compact that they are not burdensome to carry, but are still powerful enough to be useful for astronomy. Make sure that the binoculars’ magnification is not too great. More than 10x is not advisable if you want to be able to hold the binoculars in your hand and do not want to mount it on a tripod. In addition, optical quality is crucial. Light transmission, contrast, coating and colour fidelity. This is where simple binoculars differ from high-quality ones.
What is the difference between Nexstar GT and Nexstar SE / SLT?
You will occasionally find similar-looking models from the GT series on the internet. The SE series is the successor to the GT series. Their prices reflect the differences between the series: with GT models, the tube is not detachable from the fork, there are no GPS connections and no camera connections, so the electronics are generally much more simple. The software version is two years old. And there is no XLT coating on the GT devices!
What is a piggyback adapter, and where do I find it?
With the help of a piggyback adapter, it is possible to attach a camera with a normal photographic lens to the telescope, and to track with the telescope. On some instruments, it is already pre-mounted on a tube clamp.
My Meade GoTo telescope is positioning inaccurately. What can I do about it?
When pointing at reference stars, deviations of up to 15 degrees are normal. Because this is often outside the finder field of view, using a SmartFinder is often helpful. However, since there are often problems with daylight saving times, you may want to set winter time (DST - 1 hour) as the default, and set the daylight saving parameter to "No".
After aligning to the two reference stars, there should be no further problems with the GoTo. However, as described in the operating instructions, it is important to train the drive once a year! Drive training can also be carried out during the daytime.